 digitizemypattern
Your paper blocks, in CAD by Friday.
Every shop has the same shelf: manila blocks, taped repairs, a marker pen note about which size it really is. Digitizing that shelf usually means a table you do not own, or a studio invoice for every single piece.
- No minimum. One block is a job. The shelf can go a few pieces at a time, in the order you need them.
- The outline is on screen in about a minute, not when a job comes back. You see what you are getting before anything is charged.
- Corrections are yours and they are free. Points, curves, notches and the grain line all move in the browser, as many times as it takes.
- Nothing leaves the shop. The blocks stay on the rack: what travels is a photograph taken on the floor.
For reference, a US digitizing bureau lists about $7.50 a piece with a $50 minimum on every style. Nothing here while the demo runs. Files come out on AAMA / ASTM layers and open in AccuMark and Optitex.

What this actually solves
Three things that keep paper blocks out of your CAD, and what happens to each of them.
Studio rates per piece
Hand digitizing in the US runs to a few hundred dollars a piece, so an archive of forty blocks never gets quoted, let alone approved. Here the cost per piece is small enough to digitize the shelf a few pieces at a time.
Hardware you do not have
A digitizing table is a fixed cost and a floor space argument. A phone and a browser are already in the room, and nothing gets installed on the shop computer.
Waiting on someone else
Sending blocks out means a courier, a queue and a week. Shooting them yourself means the marker maker has the DXF the same afternoon.
Before and after
Real photo · real trace · nothing retouched
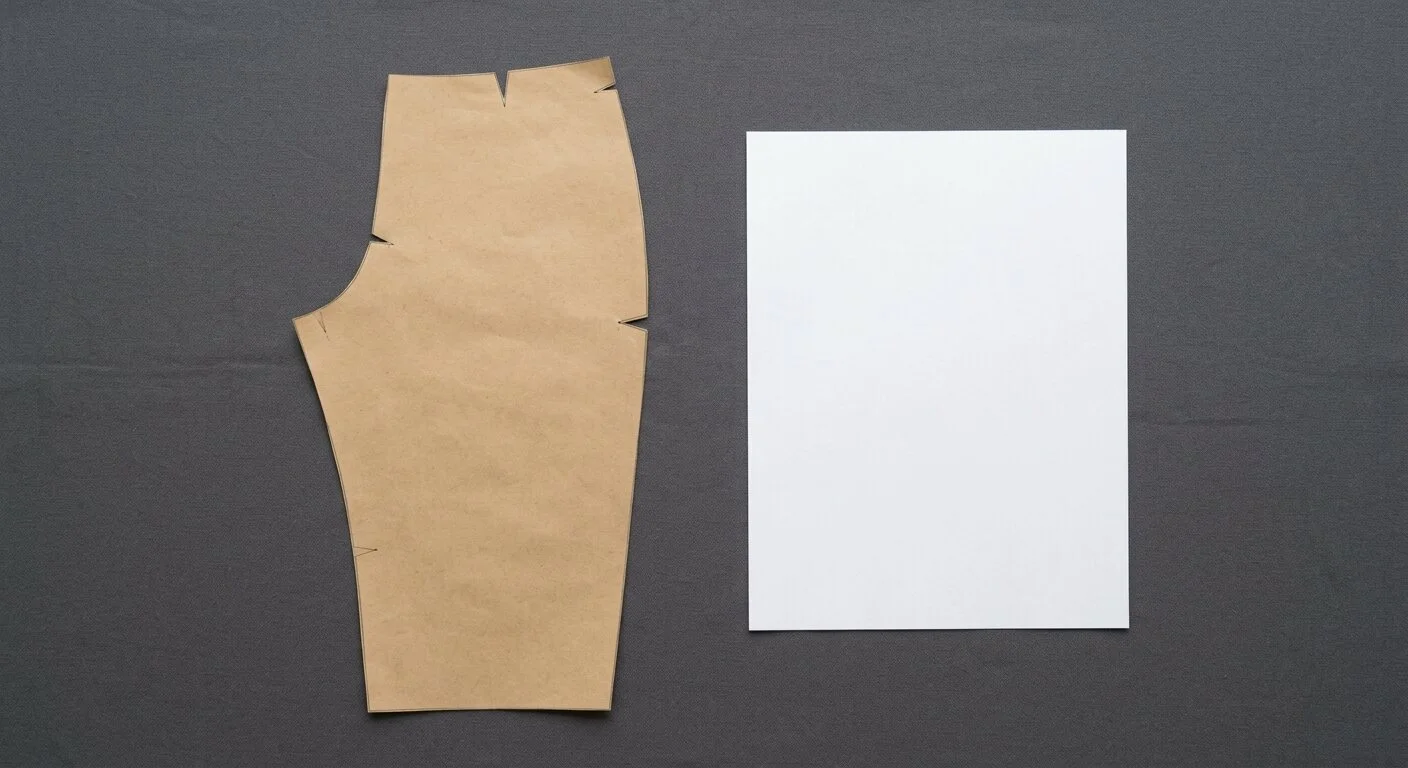
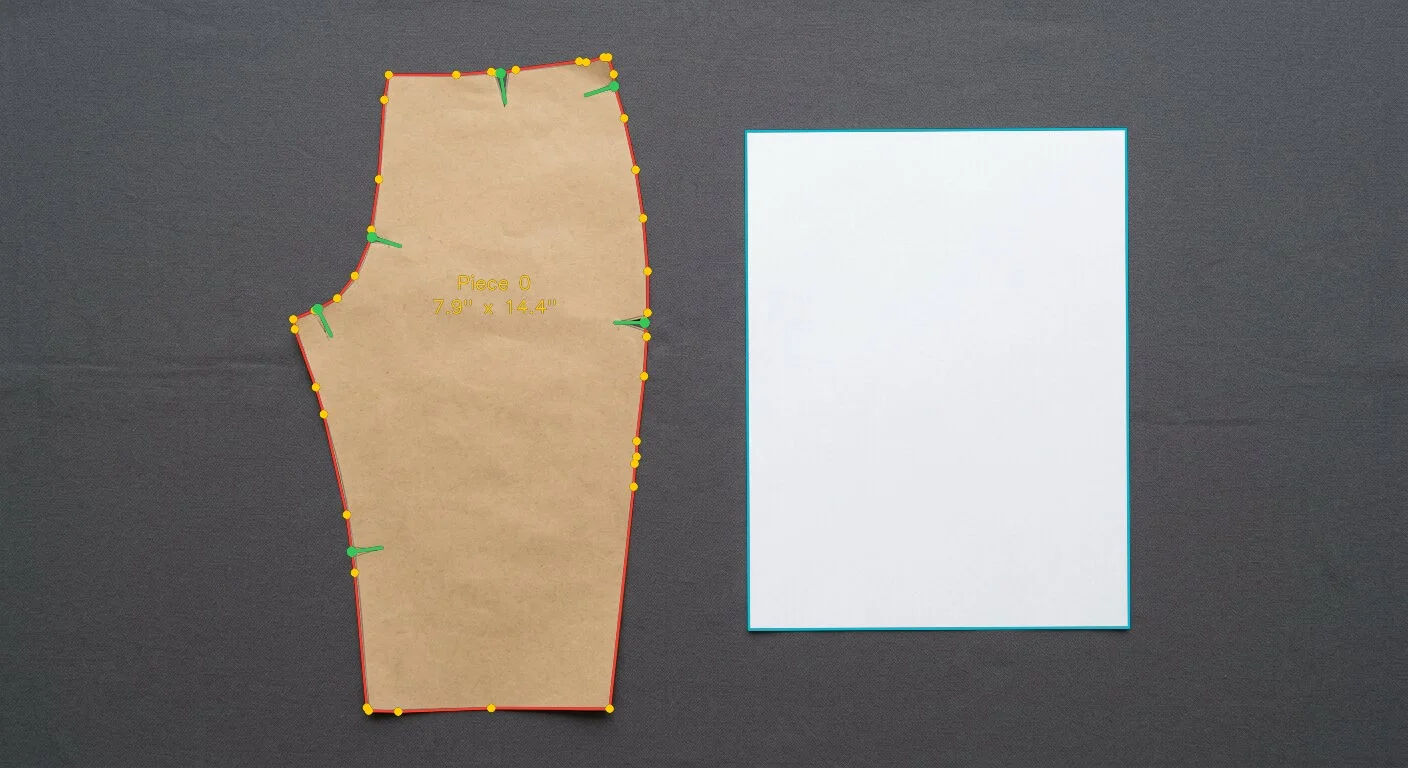
What lands in your CAD
The DXF is written the way apparel software expects it, not as a flat drawing you have to rebuild.
Layered to AAMA / ASTM
Cut line, notches, grain and internal lines each on their own layer, with piece names you can edit.
- Gerber AccuMark, Optitex, Lectra
- StyleCAD, Assyst, Seamly2D
- AutoCAD and Fusion 360
- Ready for grading and markers
Tiled proof for the floor
Print at true size on Letter or A4 sheets and lay the paper proof over the original block before you trust the file.
- 0.4 in overlap and join marks
- Assembly map on page one
- Test square to confirm scale
- Any office printer
Straight to the plotter
Standard HPGL with clean pen-up and pen-down moves for a plotter or a cutting table.
- Graphtec, Roland, Mutoh
- HP DesignJet, rolls up to 63 in
- No conversion step
- Same geometry as the DXF
How a shelf gets done
One person, one phone, one afternoon. Nothing leaves the shop.
Clear a table
Dark surface, good light, a stack of blocks and a pad of paper for the scale sheet.
Shoot one at a time
One piece per photo with the sheet in frame. A slight tilt is fine, we straighten against the sheet.
Upload the batch
Each piece is traced separately so you can accept the good ones and redo the rest.
Check against the paper
Print the PDF proof, lay it over the block, then take the DXF into grading.
Questions from shops
How close does it get to the paper block?+
About ±0.06 in on a large piece when the photo is taken straight down with the sheet in frame. Print the tiled PDF and lay it over the original before you commit the file to a marker.
Does it handle notches and grain?+
Notches are detected and written to their own layer with angle and depth. The grain line is placed automatically and can be moved by hand in the editor. Without a grain line some CAD systems refuse to import notches at all, so we always write one.
What about seam allowance and grading?+
We digitize the piece as it is on the paper. Adding or removing allowance and grading the nest stays in your CAD, where your rules already live.
Can we run a whole archive through it?+
Yes, a piece at a time. For a large archive tell us how many pieces and we will quote a flat price and a turnaround rather than charging per piece.
Other benches
Start with one block off the shelf.
Free while the demo runs. If the trace is wrong, you fix it yourself.